Getting started + codegen
Record your first tests using codegen
You set up Playwright in the prep lesson and you have six green example tests. Now we put Playwright to work — against the store you're already looking at — by recording our first real tests with codegen.
But first things first, often I see that people are confused about Playwright. And indeed, things got a bit blurry the last few months.
Playwright enables reliable web automation for testing, scripting and AI agents.
Alright. 🤷
The Playwright library and Playwright Test are two different things.
Playwright is the automation library; Playwright Test is the test framework built on top of it. Throughout this workshop, "Playwright" and "PWT" always refer to the test framework.
The same flow looks very different depending on which one you reach for:
import { test, expect } from "@playwright/test";

test("homepage has the right title", async ({ page }) => {
  await page.goto("https://example.com");
  await expect(page).toHaveTitle(/Example/);
});
Run with npx playwright test. Fixtures, parallelism, retries, reporters, traces, and the HTML report all come for free.
import { chromium } from "playwright";

const browser = await chromium.launch();
const page = await browser.newPage();
await page.goto("https://example.com");
console.log(await page.title());
await browser.close();
Run with node title.ts. You manage the browser lifecycle, assertions, retries, and reporting yourself — useful for scripts and scrapers, testing not so much.
Today we'll use Playwright for end-to-end testing and AI agent automation.
Let's get used to some common commands and CLI flags.
Watch the example tests run
You already saw npx playwright test print six green dots in prep. Add --headed and the browsers actually pop open:
$ npx playwright test --headed
Three browsers click around your screen and disappear. Let's record new tests with codegen.
codegen — record a real test against the store
codegen opens a browser, follows you around, and writes the test for you. It listens to clicks, fills, and navigations and emits Playwright code in the right format.
$ npx playwright codegen https://www.playwright-workshop.online/
Two windows pop open: a browser pointed at the store, and the Playwright Inspector showing generated code as you click.
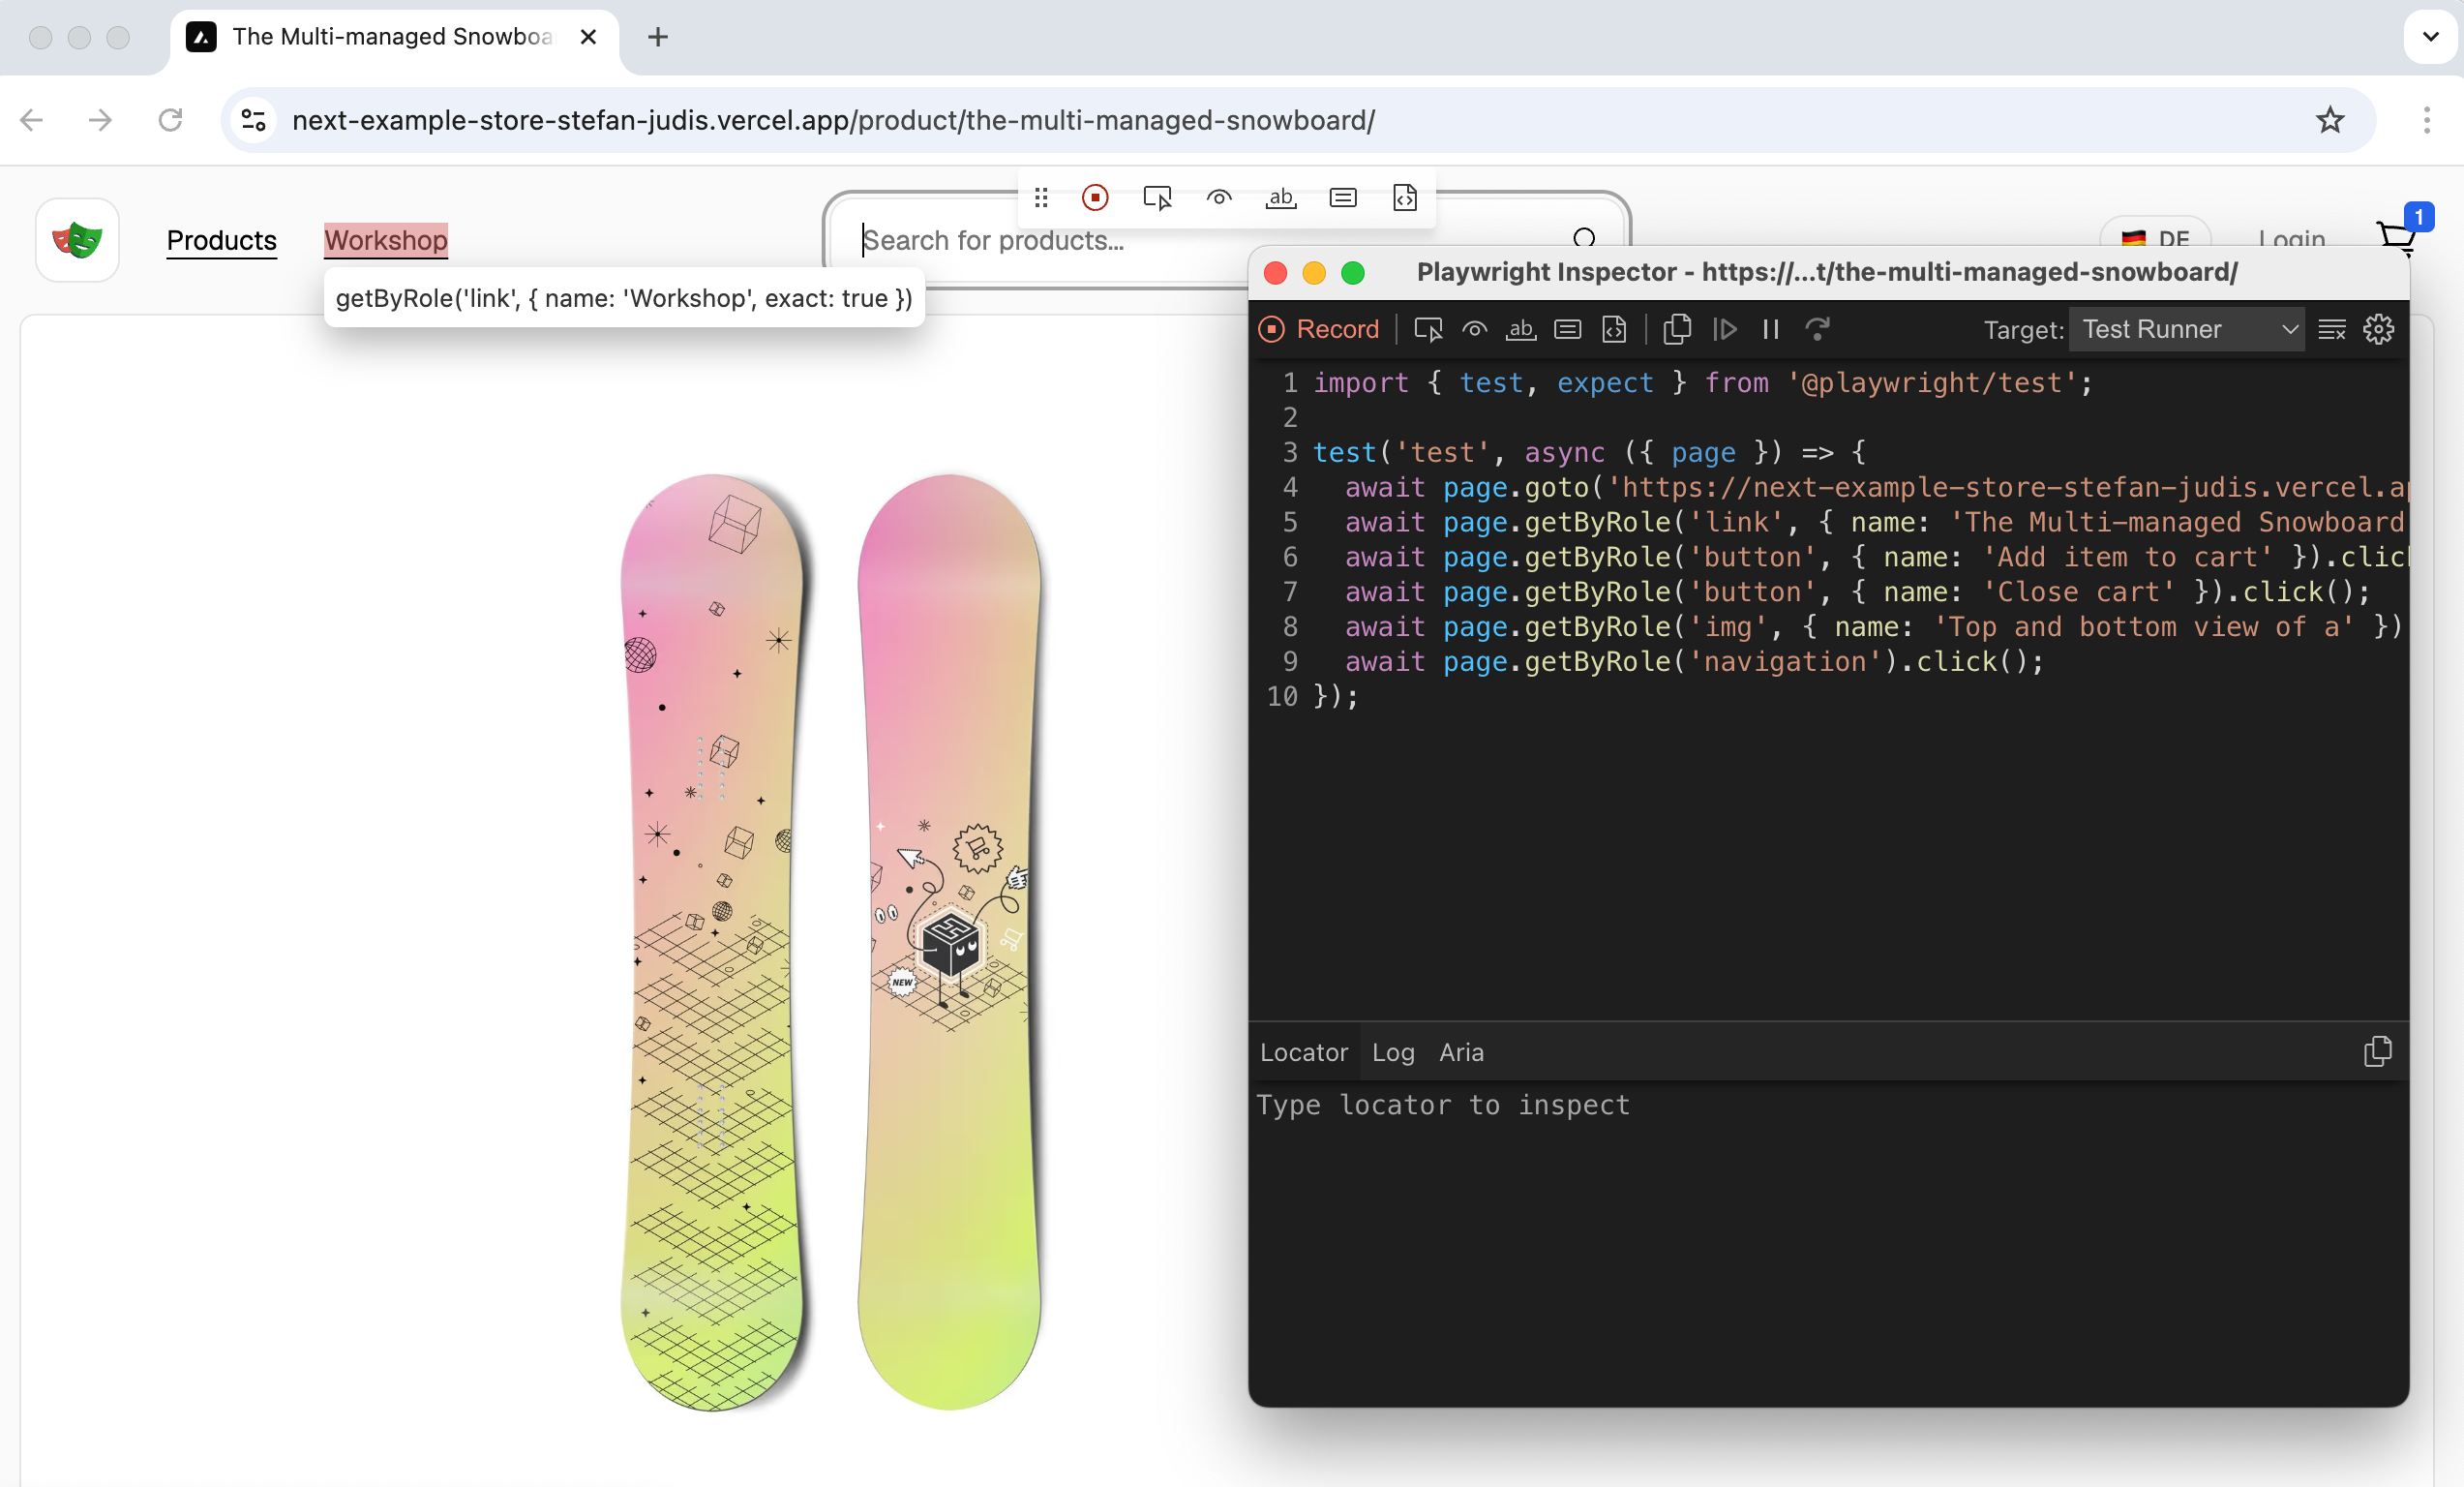
Click around. Add a product to the cart. Watch the right-hand panel fill in:
import { test, expect } from "@playwright/test";

test("test", async ({ page }) => {
  await page.goto("https://www.playwright-workshop.online/");
  await page.getByRole("link", { name: "The Multi-managed Snowboard" }).click();
  await page.getByLabel("Add item to cart").click();
  // ...
});
When you're happy, copy the test out, paste it into a new file (tests/shop.spec.ts) under tests/, and run it.
$ npx playwright test tests/shop.spec.ts
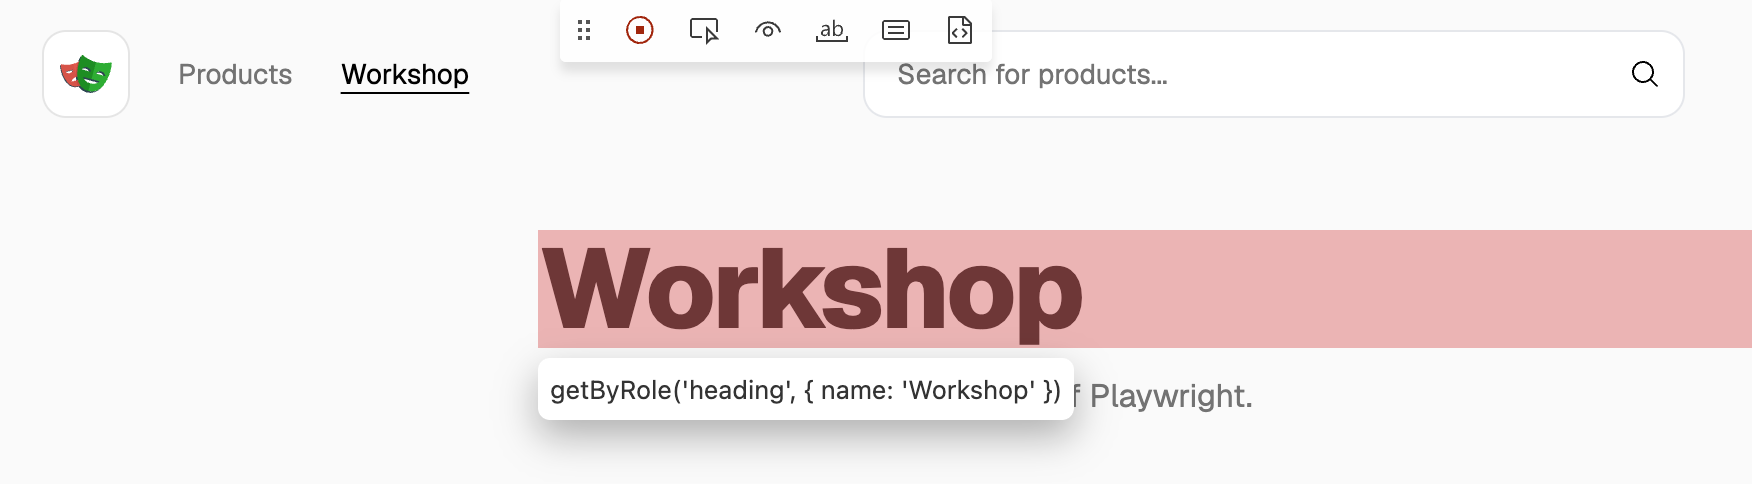
Play around with codegen. Pay attention to the small toolbar — it also lets you add assertions on the fly!
If you don't want to copy and paste the code you can also apply the --output param.
npx playwright codegen $YOUR_URL --output tests/new.spec.ts
VS Code user? If you want to record and control your Playwright tests from within the editor, the official extension is "okay'ish". I always preferred the other tools, but maybe you'll like it!
Record at least two user flows
Record each in a fresh codegen session, paste into tests/shop.spec.ts, and confirm npx playwright test shop.spec.ts is green. Don't worry about assertions yet — we'll add those in the assertions lesson.
Add-to-cart from home
- Run
npx playwright codegen https://www.playwright-workshop.online/. - Open a product detail page.
- Click Add to cart.
- Change the quantity of your item in the cart.
- Close the cart.
- Copy the generated code into
tests/shop.spec.tsand run it.
Add-to-cart from the catalog
- Start another
codegensession. - Navigate to the catalog with the "Products" link.
- Add one of the items to the cart.
- Save the test and run it.
At this stage, you should have at least two test cases covering catalog and home add-to-cart behavior.